Showing posts with label cake. Show all posts

Friday, July 27, 2012

Blueberry Cheese Cake

This is the my second attempt baking this cheesecake after my first success. I've been baking lately but could never find the time to blog and post my baking adventure. Personally I feel baking cheese cake is the easiest since its so versatile and even if you make any mistakes, the cake wouldn't turn out inedible. Here's my recommended recipe for those who need a quick and easy way to bake a cheese cake. 

My first attempt - looking nice and I'm so thrilled


Second Attempt - Still looking good, hehe

INGREDIENTS
120g digestive or marie biscuits
75g butter, melted

750g cream cheese
210g sour cream
150g granulated sugar
1 tsp vanilla essence
250g blueberry fillings
1 tsp lemon juice, optional
3 eggs

METHOD
1. Crush the biscuits into crumbs, finely or coarsely depending on your likings. I prefer a more rough texture, so that I can taste the biscuits. Pour in the butter and mix well.
2. Press the crumbs into a 8 inch spring pan as the base and set aside.
3. In bowl of an electric mixer, mix cream cheese with sugar until smooth. 
4. Then mix in the eggs one at a time, mixing just enough to incorporate. 
5. Finally mix in the sour cream, vanilla essence and lemon juice until smooth. 
6. Pour the cream cheese filling into the prepared crust. Drop some blueberry fillings randomly on top of the cheese cake, and swirl using a fork.
Note: If you want some blueberry fillings in the cake, you may fill half of the cream cheese and spread some blueberry in between before filling the remaining cream cheese.
7. Bake the cheesecake in a preheated 165 Celsius oven using the water bath method for 60 minutes. Let the cake cool slightly in oven with the door ajar for about 15 minutes to prevent cracking. The top layer will appear slightly brownish, just perfect.
8. Chill in refrigerator for at least 4 hours before serving. 


Saturday, July 21, 2012

Apple Crumble Cake

I've always wanted to try baking an apple crumble cake. When I have some red apples sitting in the fridge for too long, this recipe comes across my mind. Hmm, Granny smith apples? For newbie like me, I don't have the slightest idea why it's named like that in the recipe. Well, that name refers to no other than green apples. I think many recipes call for green apple instead of the red one because it's more crunchy and the slight sourness of the fruit can bring the extra flavor in the end-baked products. But mine turned out not bad after all, even using red apples ;-)


INGREDIENTS

Part A - Apple topping
20g butter
100g granulated sugar
3 green apples, peeled, cored and cut into 1/2 inch thick wedges. ( I used Fuji red apples)

Part B - Crumb topping
115g butter, melted
100g brown sugar
150g granulated sugar
1 tsp cinnamon powder
110g plain flour
1 cup walnut, toasted

Part C - Cake
80g butter
150g granulated sugar
2 eggs, grade A 
110g cake flour
1 tsp baking powder
1/4 tsp table salt
1 tsp cinnamon powder
1/2 tsp ginger powder

METHOD
1. Start by completing part A and B first before moving to part C.
2. For part A, melt the butter over medium-heat fire on a medium size pan. Add in the sugar and continue cooking until the sugar is dissolved and fragrant. Finally add in the apple and continue to cook until the apples have softened slightly. Remove from heat and cool to room temperature.
3. Part B is the easiest. Whisk together flour, both sugars, walnut, cinnamon powder and salt in a medium bowl. Add melted butter and using your fingers, mix together to form large crumbs.  Set aside for use later.
4. For Part C, making the cake. In a large bowl, whisk together flour, baking powder, ginger powder, cinnamon powder and salt. Then cream together butter and sugar until light and fluffy for about 2 to 3 minutes. Add the eggs and mix until well combined. Finally using a spatula, fold in the flour mixture and mix slowly until well combined. Do not overmix, else the cake will have  a rough texture.
5. Pour the cake mixture into a 8 inch spring pan and spread evenly. Take the apple slices and layer them over the top of the cake, overlapping them slightly so that they're in one thin layer covering the entire surface of the cake.
6. Finally, sprinkle all the crumbs onto the cake as toppings. Bake the cake in a pre-heated oven at 170 Celsius for about 60 minutes or until skewer comes out clean.
7. Remove from oven and let cool completely before serving.


Wednesday, March 21, 2012

Castella Cake

The name of this cake really caught my attention when I was hunting for a quick and esay recipe. Castella (カステラ Kasutera) is a popular Japanese sponge cake made of sugar, flour, eggs and starch syrup. You will see many adaptations of this recipe into green tea, chocolate or even cream cheese due to its simple and natural texture for experimentation. Well I haven't try to create my own recipe yet and  this is my first attempt using the recipe from AnnCoo. Well, I must say this cake really taste nice and not too filling for a second piece.

INGREDIENTS
4 large eggs
80g castor sugar
75g milk
60g wild honey
10g cake emulsifier
55g bread flour
90g plain flour
a pinch of salt (optional)
50g butter, melted

METHOD
1. Sieve the bread and plan flour twice and keep aside.
2. Using a electric hand-mixer, beat the egg, sugar and emulsifier in a medium bowl for about 10 minutes until thick and creamy white.
3. Add in the flour bit by bit alternating with milk and combine well using a whisk or spatula..
4. Lastly add in wild honey and butter in batches and combine until even.
5. Pour the batter into two medium loaf pan and bake in a pre-heated 160 Celsius oven for 40 minutes.
6. Cool on wire rack and enjoy.


Sunday, February 26, 2012

Chocolate Walnut Cake

Sometimes I felt I'm such a lazy person when it comes to baking. I intended to bake a banana cake this weekend but ended up baking this chocolate walnut cake instead because I don't want to drive all the way to the market to just buy a few bananas. This cake still have the banana texture but with Cadbury chocolate flavors ;-) 


INGREDIENTS
PART A
150g butter
30g brown sugar
1 tsp vanilla essence
4 egg yolks

PART B
4 egg whites
80g castor or granulated sugar
1/4 tsp cream of tartar

PART C
90g cake flour
1/2 tsp baking powder

PART D
40g walnut, toasted and crushed
80g Cadbury chocolate grated, store in fridge to avoid melting.
 
METHOD
1. Prepare all the ingredient parts and lined a 6" round cake pan.
2. Start with part A ingredients, i.e. cream the butter, brown sugar and vanilla essence until smooth and pale using a electric hand-mixer. Add in the egg yolks and beat until combined.
3. Beat the part B ingredients i.e. egg whites, sugar and cream of tartar until stiff peaks form. Fold the egg whites into batter (A).
4. Sift part C ingredients and fold into the mixture slowly.
5. Finally add in part D ingredients and mix until even.
6. Bake in a preheated oven at 180 Celsius for 25-30 minutes or until skewer comes out clean.
 

Thursday, January 5, 2012

Lemon Cheesecake

First post for 2012 with another favorite cheesecake recipe. I wanted to make a blueberry cheese cake initially but since my brother is around and berry is not his cup of tea, I changed my mind. This lemon cheese cake is matched with Oreo crumbs as the base and sinfully tasty. 


INGREDIENTS
Base
100g Oreo cookies crumbs
50g butter, melted

Filling
250g cream cheese
65g whipping cream
30g granulated sugar
2 tbsp corn flour
1 tbsp lemon juice
1/2 tsp lemon essence
1/2 tsp vanilla essence
3 egg yolks
3 egg whites
35g granulated sugar

METHOD
1. Mix the Oreo crumbs with butter in a small bowl. 
2. Press the crumbs onto an 8" spring form cake pan lined with aluminum foil and chill in the refrigerator while you prepare the filling.
3. Beat the cream cheese and sugar together until creamy. Add in the whipping cream slowly and continue to beat with medium speed until.
4. Then add in the egg yolk one at a time while beating the mixture until combined. Add in vanilla essence, lemon essence and lemon juice.
5. Sift the corn flour into the mixture and mix well using a spatula. Set aside.
6. Whisk egg whites and sugar until soft peak. Then fold in the egg whites into the cheese mixture using a rubber spatula.
7. Pour the mixture into the prepared base.
8. Bake at 160 Celsius for 60 minutes using steam bath method.
9. Cool to room temperature and chill cheesecake at least 4 hours before serve.

Before Decoration

TIPS: Decorate with some cocoa powder and icing sugar

Wednesday, November 30, 2011

Pumpkin Raisin Cake

I always look for simple and fuss free recipe since I only have a few hours to spare after work for my baking endeavor. With some pumpkin left and not looking for anything fancy to bake, this is  indeed something practical and healthy for my morning cravings.

Those raisins are popping out..jeez


(Recipe adapted from YumYum magazine, Edition 64)
INGREDIENTS
250g butter
180g brown sugar
4 medium eggs

270g plain flour
1tsp baking powder
1/2 tsp cinnamon powder
2 tbs full cream / fresh milk 

300g pumpkin, shredded
100g raisins

METHOD
1. Line a 8 inch square pan and preheat the oven at 180 Celsius. I used two 9x5 inch loaf pan to make two separate cakes for giveaway later, hehe.
2. Using a electric hand-mixer, cream the butter and brown sugar until smooth and pale.
3. Add in egg one at a time and mix well after each addition.
4. Sift in the flour, ,baking powder and cinnamon powder into the egg mixture.
5. Add in the milk and stir well using a spatula.
6. Then mix in the pumpkin and raisin until fully combined.
7. Pour the batter into the pan and bake for 45 minutes or until skewer comes out clean.
8. Remove and cool on wire rack.

Fresh from oven and smells so good!

Sunday, November 27, 2011

Sakura Cheesecake

Yeah, its cheesecake again which I can't get tired of. This cheesecake is also known as Japanese cotton cheesecake due to its light and soft texture. You'll be craving for another piece when you finish eating your first piece. I think it tastes better than those sold at Jusco.
Try the recipe and you'll never regret it.


INGREDIENTS
250g cream cheese
100ml fresh milk or full cream milk
1 tsp lemon juice
60g cake flour
20g cornflour
50g butter

120g granulated sugar
6 egg whites
6 egg yolks
1/4 tsp cream of tartar

METHOD
1. Melt cream cheese, butter and milk over a double boiler. Stir it well and let the mixture cools down.
2. Fold in the cake flour, corn flour, egg yolks, lemon juice and mix well.
3. Using a electric hand-mixer, beat the egg whites until foamy. Turn speed to medium and add in cream of tartar and sugar gradually. Beat with high speed until soft peaks form.
4. Add the cheese mixture to the egg white mixture and mix well. Pour into a 8-inch round lined cake pan 
5. Bake cheesecake in a water bath for 70 minutes or until set and golden brown at 160 degrees C.
6. Once done, remove out the cake and let it cools off completely on a wire wrack. Do not leave the cake in the pan or else bottom of the cake will be ruined by the moisture.
7. Enjoy with a cup of coffee.

NOTE: This recipe is taken from two sources which I have no ideas where it originates from, Diana Desserts or Bake With Yen recipe book. Doesn't really matters as long as it taste good!

Tuesday, November 22, 2011

Green Tea Chiffon Cake

I'm making chiffon cake again and this time its the Matcha, which means green tea in Japanese. Not many people likes the green tea flavoring and I'm happened to be one of them. But, I can still take it if the flavor is not too strong. Matcha is also said to boost metabolism and helps to reduce cholesterol levels when consume regularly. Well, I guess its not too bad to have a taste of green tea once in a blue moon.

INGREDIENTS
PART A
5 egg yolks
1 tbs honey
40g granulated sugar

PART B
50ml warm water 
2 tsp green tea powder
4 tbs corn oil
1/2 tsp vanilla essence

PART C
100g cake flour
3/4 tsp baking powder

PART D
5 egg whites
1/2 tsp cream of tartar
30g granulated sugar 
100g chopped walnuts

METHOD
1. Cream part A ingredients until the sugar is dissolved and looks creamy pale yellow. You may use a hand whisk or electric mixer.
2. Mix the green powder with warm water and stir until combined. Then add in the corn oil into the creamy batter together with the green tea powder mixture and vanilla essence.
3. Sift in the cake flour and baking powder into the batter. Mix until no lumps are seen using the whisk.
4. Its time to beat the egg white until stiff peak. When the egg white starts to become frothy, add in the cream of tartar and sugar. Continue to beat until stiff peaks are form.
5. Fold in the egg white into the earlier egg yolk mixture using a spatula. Fold slowly until they are well combined.
6. Add in the chopped walnuts and give it a few stirs.
7. Pour the mixture into a 22cm tube pan and give it a few bangs to release any air bubbles.
8. Bake in the preheated oven for about 35 minutes or until skewer comes out clean.

9. Once done, invert the cake on a wire to cool completely.
10. Serve and enjoy!

Thursday, November 10, 2011

Oreo Cheesecake ( Non-bake)

This is really a tested recipe and it works really well, as shared by many aspiring bakers in their blogs (Small Small Baker, Baking Mum, Bakericious, Do What I Like, just to name a few). Even kids can make this simple cheesecake too, a good and fun family activity. I attempted this recipe since I need a break from real baking and of course saving a few bucks off my electricity bill. What makes this cake a popular choice is really the scrumptious Oreo cookies that almost nobody can resist. Not to mention the dual layer of creamy and not-too-sweet cream cheese.

Here's my very own adapted version, delicious dual layer Oreo cheesecake. Enjoy!


INGREDIENTS
Biscuit base
110g digestive biscuits (8-10 pcs, crushed finely)
50g melted butter

Creamcheese filling
250g cream cheese, (I use Philadelphia)
50g icing sugar
60ml milk
1 tbsp gelatine powder  
75ml water
250 ml whipped cream (whipped until medium peak)
1/4 tsp vanilla extract 
1 tbsp golden syrup (you may substitute with maple syrup/ honey)
10 Oreo cookies (crushed)

Toppings
Extra crushed Oreo Cookies for sprinkling
 
METHOD
1. Line a 8 inch spring round pan with aluminum foil (optional, as I hate washing later)
2. Pour the melted butter into the digestive biscuit crumbs and mix well. Then press the crumbs firmly onto the base of the cake pan using the back of a spoon. Chill the base in the fridge until we prepare the cheese filling.


3. In a small bowl, dissolve the gelatine powder in the 75ml water and let them swell. To make sure the gelatine melt completely, you can either double boil or microwave at high heat for 1 minute.
4. In a large bowl, beat the cream cheese with the icing sugar until smooth and creamy.
5. If you have yet to whip your whipping cream, its time to do so.
6. Now beat in the the milk and gelatin into the cream cheese mixture, which will look watery.
7. Fold in the whipped cream into the cream cheese until well combined and divide into two portions.
8. For the first portion, add in the golden syrup and vanilla extract. Once combined, pour the mixture into our chilled biscuit base and let it set in the fridge for about 15 minutes. You may put it in the freezer too to speed up the process.


9. For the second portion, mix in the crushed Oreo biscuits and pour onto the set first layer. Level with a spatula or shake it gently to form an even surface.


10. Chill in the fridge for at least 3 hours before decorating with Oreo cookies toppings.
11. Serve chilled and enjoy.


Saturday, November 5, 2011

Carrot Fruit Cake

I saw this recipe in newspapers and decided to give it a try, but with slight modifications of course. Knowing my dad likes carrot cake a lot and being health conscious, the sugar was reduced in this recipe. And the cake turns out to be nice and yummy with a nice scent of cinnamon.


INGREDIENTS
200g plain flour
1 ¼ tsp baking powder
½ tsp soda bicarbonate
1 ¼ tsp cinnamon powder
4 eggs
120g granulated sugar
150ml corn oil
200g grated carrot
100g mixed dried fruits
50g toasted walnuts, coarsely chopped

METHOD
1. Line a loaf pan with baking paper and preheat oven to 180 Celsius
2. Sift flour, baking powder, soda bicarbonate and cinnamon powder into a medium mixing bowl.
3. Mix eggs, sugar and oil in a separate bowl and stir until well combined.
4. Add the liquid mixture into the flour mixture and stir until it becomes a batter.
5. Stir in the grated carrot, walnuts and mixed dried fruits and mix well.


6. Pour the batter into the loaf pan and bake for 35-40 minutes until cooked through when tested with a skewer.

7. Let the cake stand in the oven for 10 minutes before cooling on a wire rack
8. Serve while it’s warm which taste best.

Wednesday, October 12, 2011

Crunchy Peanut Pound Cake

With some peanut butter left in my kitchen cabinet and expiry date is around the corner, I decided to bake a simple pound cake. Reason being, I knew that I could have never finish eating the peanut butter myself in such a short time. The final result is a perfectly baked golden pound cake.


INGREDIENTS
1.5 cups self raising flour
250g peanut butter, either crunchy or smooth
150g butter, soften at room temperature
1/2 tsp vanilla essence
3 large eggs
3 cups of brown sugar 
1 cup milk

METHOD
1. Preheat oven to 170 Celcius and line a 10'x5' loaf pan with baking paper.
2. In a large bow, beat sugar, butter, vanilla essence and eggs with a hand electric-mixer on low speed for a minute.
3. Using high speed, beat the mixture for 5 minutes until pale and creamy. Remember to scrape the bowl occasionally to ensure all the ingredients is mixed altogether.
4. Beat flour into the batter alternately with milk on slow speed just until smooth after each addition.
5. Pour the batter into the loaf pan and bake for 45 minutes or until skewer comes out clean.
6. Cool on a wire rack and serve. 

Nice Golden Brown!

Friday, September 30, 2011

Chocomint Cheese Cake

Two things that I really enjoy eating is chocolate and cheese. With a dose of peppermint flavour added to them, it would be a splendid combination indeed for dessert. This recipe was taken from Anncoo blog with some slight modifications. I'm making this cake after my working hours and with all the mess in hands and number of steps involved, I hardly have enough time to snap more pictures to share.  Even though I'm making half of this recipe, it's worth all the effort being put in after seeing my bakes from the oven. I hope you will too  ;-)


INGREDIENTS
Chocolate sponge cake (Base)
4 eggs, separate egg yolks and whites
70g Sugar
60g cake flour, sifted
20g cocoa powder, sifted
40g butter
20g milk

Mint cheesecake
250g cream cheese
50g granulated sugar
3 large eggs
40g whipping cream
1 to 2 tsp peppermint essence

METHOD
You will need to prepare the base first before making the cream cheese mixture
Chocolate sponge cake (Base)
  1. Beat egg yolks and half of the sugar using a balloon whisk until pale and fluffy. 
  2. Using spatula, mix in flour, cocoa powder, milk and melted butter. 
  3. Beat egg whites and the remaining sugar using an electric hand-mixer until soft peaks form. 
  4. Fold egg whites into the egg yolks mixture slowly, do not stir.
  5. Pour the mixture into a 8" square cake tin and bake in a preheated 180C oven for about 20 minutes or until done.
  6. Leave the cake to cool in tin while you prepare the cream cheese batter
Cream Cheese mixture
  1. Beat cream cheese and sugar using an electric hand-mixer until smooth.
  2. Add one egg at a time and combine well after each addition.
  3. Fold in whipping cream and peppermint essence, stir well.(optional ~add a small drop of apple green coloring)
  4. Pour the cream cheese batter over the chocolate cake base.
  5. Bake in water bath at 160C for about 30-45 minutes.
  6. Leave the cheesecake cool in cake tin before removing it.
  7. Chill cheesecake in the refrigerator for at least 4 hrs before serving.
Enjoy like I did

Monday, September 26, 2011

ChocoSpice Cupcake

While blogwalking, I stumbled upon this quick and easy cupcake recipe made for two which suits any occasion (tea break, valentine or cravings). What's more amazing is NO BAKING is involved and it can be ready in merely 2 minutes. If you have a microwave oven, you're all set to go for this simple recipe. The only caution here is you need to have silicon cupcake liners because paper liners won’t hold their shape and foil liners are not microwave safe. Nonetheless, I opt for ramekins instead. 

Just The 2 of Us
INGREDIENTS
2 tbs all purpose flour
2 tbs brown sugar or granulated sugar
4 tsp cocoa powder
1/4 tsp of all spice powder
1/4 tsp cinnamon powder
4 tbs milk
1 1/2 tbs unsalted butter, melted 
1/2 egg, lightly whipped
Canned whipped cream
Sprinkles

METHOD
1. Whisk all dry ingredients in a medium bowl.
2. Mix in melted butter, milk and egg until fully integrated.

3. Pour the batter equally into two ramekins.
4. Microwave on medium for one minute. The cupcake is considered cooked if it bounced back when lightly touched. If not, microwave for another minute.

5. Decorate the top with whipped cream and sprinkles.
6. Serve warm and enjoy. You have to be quick, else the heat will melt the whipped cream ;-) 
Seems like my results doesn't match what the original recipe proclaims.
If anyone try this out, please let me know.. 
Here's the link to the recipe at Paula Deen

Saturday, September 17, 2011

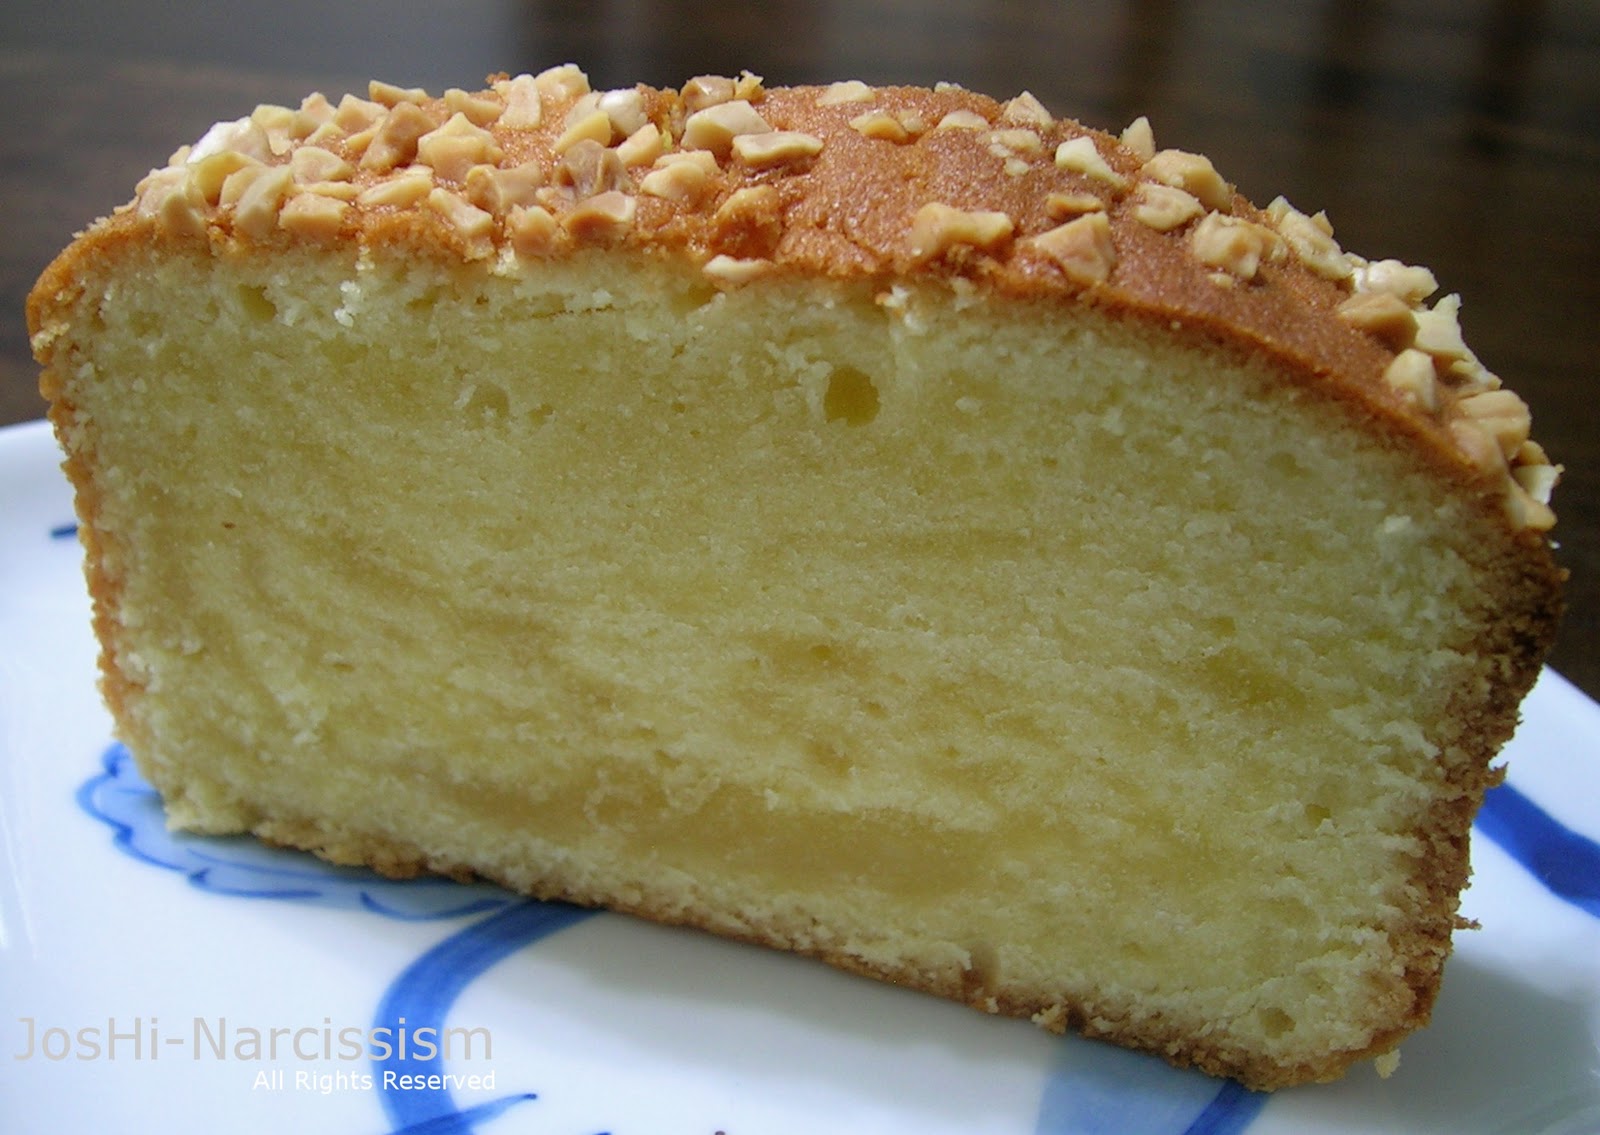
Cream Cheese Pound Cake

My parents came down over the weekend and I planned to bake something simple and nice for them. While cleaning up my refrigerator, I found a block of Philadelphia cream cheese. Remembering that I've come across a pound cake recipe at HowToEatACupcake that claims to be the best recipe ever discovered. So here's my adaptation of the recipe and I have to agree that it's very easy to make and delicious as claimed. One thing for sure is that I need to cut down the sugar level as my parents don't really like too-sweet stuff as they used to.


INGREDIENTS

180g salted butter, at room temperature
125g cream cheese, at room temperature
2/3 cup (150g) granulated sugar
3 large eggs, at room temperature
150g cake flour, sifted
1/2 tbs pure vanilla extract
Almond nibs as required


METHOD
1. Preheat the oven to 170 °Celcius and line the bottom of a  10x5" loaf pan with baking paper. 
2. Place the butter, cream cheese and sugar in a bowl and beat on medium speed with a hand-mixer for 5 minutes. Add the eggs, one at a time, beating for 30 seconds after each addition and scraping down the sides of the bowl as necessary.
Cream Cheese plus Butter
3. Beat in the vanilla essence using medium speed for 30 seconds.
4. With the mixer on low speed, add half of the flour mixture and beat for 30 seconds. Add the remaining flour and beat on medium speed for another 30 seconds.
5. Pour the batter into pan and shake lightly to even out the top. Sprinkle the toasted almond nibs on top of the batter.

6. Bake for 45 minutes or until cake is golden brown.
5. Once done, cool the cake completely on a wire rack. Serve at room temperature and enjoy. 

Yummylicious
 

Sunday, September 11, 2011

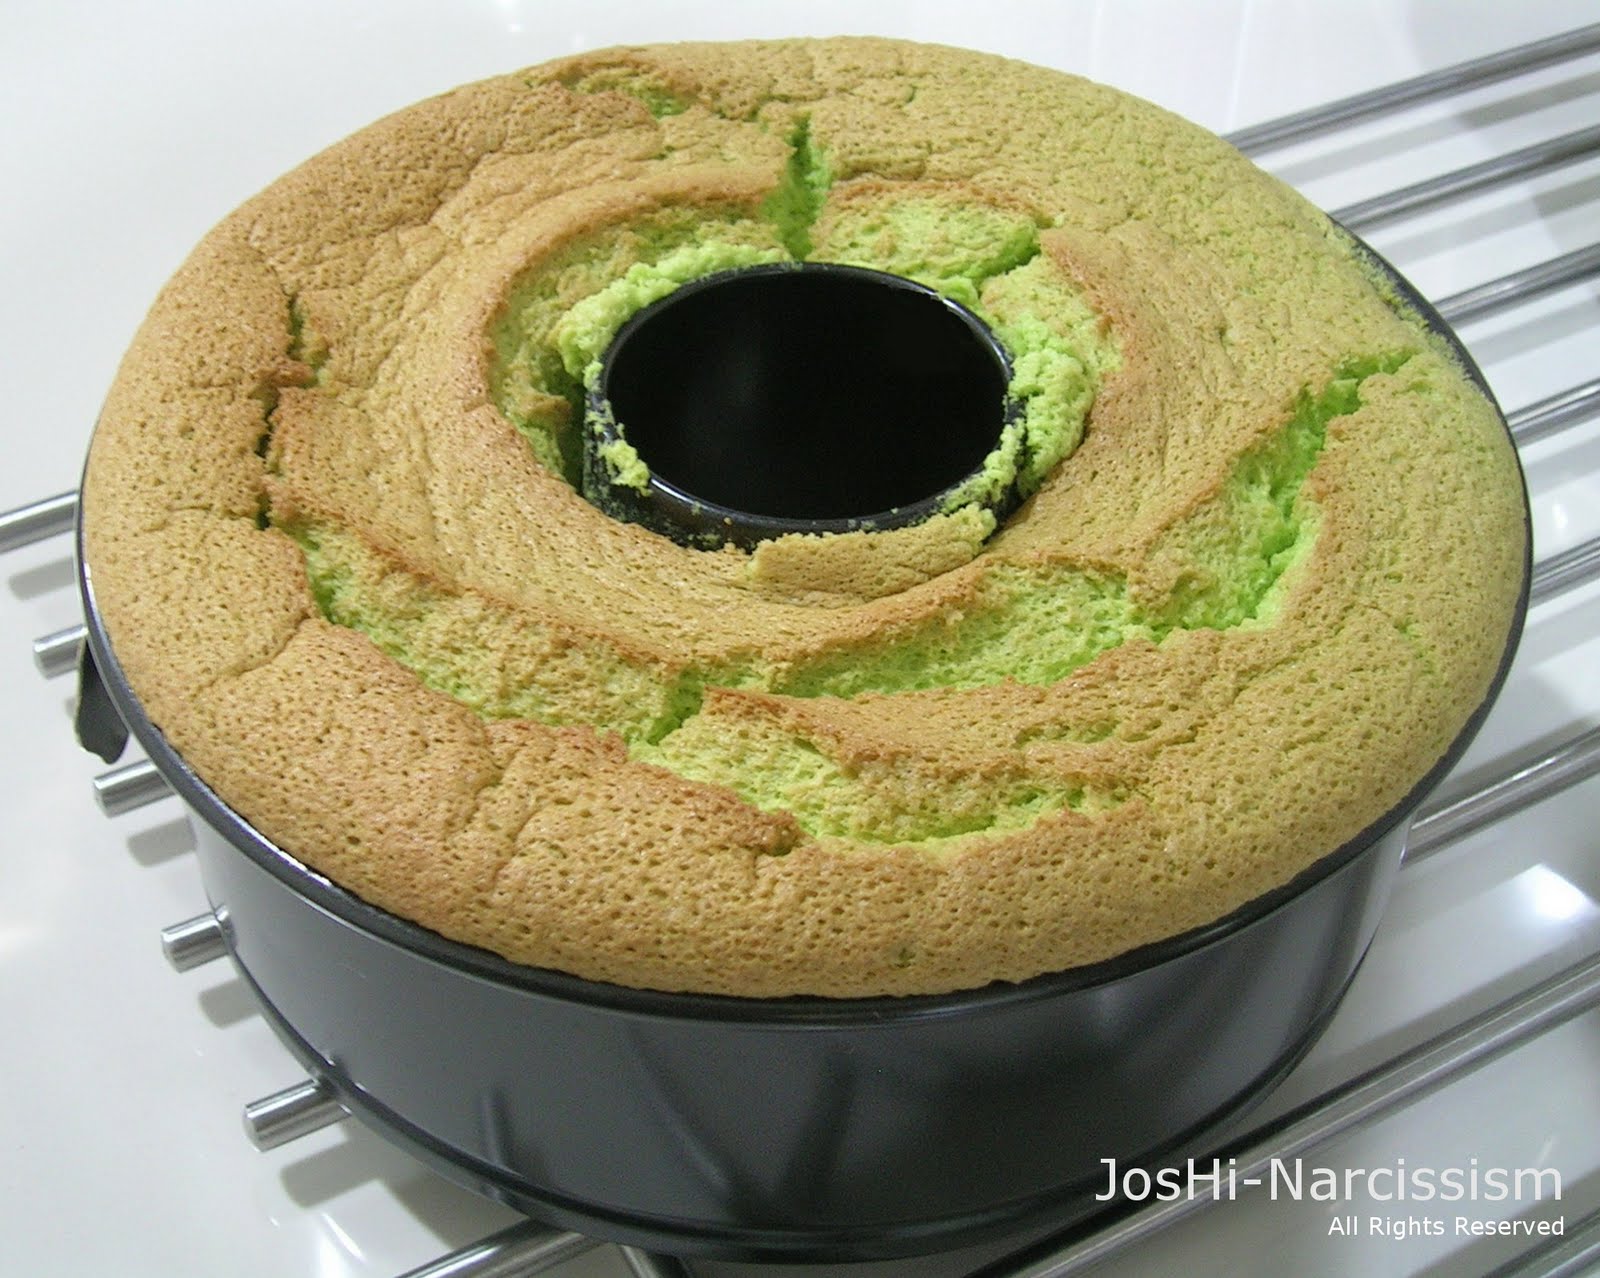
Fragrant Pandan Chiffon Cake

My pandan plants are growing to an enormous size now, must be the natural fertilizer provided by stray cats and dogs around my housing areas as well as abundant rain showers these past weeks. Yeah, I need to trim my plants to avoid it becoming a breeding ground for snakes. It would be a waste to just throw these nice and juicy pandan leaves which are so useful in many ways. I was told by many people that it is very difficult to make chiffon cake, including my mum but I don't want to give up and am not easily defeated. So here's my first attempt.

INGREDIENTS
4 eggs white
4 egg yolks
80g granulated sugar
1/3 cups (75ml)  corn oil
30ml  coconut milk
1 cup water
2 tbs of pandan extract (produced from10 pandan leaves)
1/2 cup (55g) all purpose flour
1/2 tsp emulsifier (ovalett)
1 tbs baking powder
1/2 tsp cream of tartar
1/2 tsp fine salt (optional)

METHOD
1. To prepare the natural pandan extract, blend the 10 coarsely chopped pandan leaves until fine with 1 cup of water. Sift the juice into a clear or glass container and let it sit for 15 minutes. Two layers of color can be seen and the thicker green extract is the one we need, about 2 tbs.
Blended pandan leaves
Pandan extract - juice


2. Separate the egg whites from the yolk into two different bowls. Make sure no yolk residue is found in the egg whites or be prepared for the worst.
3. Sift flour, baking powder and salt into a bowl. 
4. Add in the granulated sugar and emulsifier into the egg yolks and beat it until pale and frothy using a electric hand-mixer. Then beat in the oil, coconut milk and pandan juice until well combined.
5. Using a whisk, mix sifted flour into the egg yolk batter until integrated.
Step 5
6. Add in the cream of tartar into the egg whites and beat until stiff peak is formed.
7. Fold in the egg whites using a spatula into the egg yolk batter slowly until color is uniform. You can do this gradually by mixing half of batter.
Step7
8. Pour the mixture into an ungreased 7 inch tube pan and smooth the top.
9. Bake in the preheated oven at 170 Celcius for 40 minutes or until the skewer comes out clean.
10. Right after the cake is out of the oven, reverse the cake pan and let it cool.
11.  The cake does look  nice and its not easy to remove it from the pan while maintaining its shape. I use a knife and it turned out so ugly as you can see from my picture above.


Here's one method that I should have tried on instead to remove the chiffon cake from my pan.